

This week’s episode is a big turning point for the fifth wheel build. We finally finish the trailer chassis, add all sixteen habitat mounts, and start planning where the water tanks, brakes and storage will actually live. There’s still a lot of grinding, welding and head‑scratching, but by the end we can honestly say the steelwork is ready for the habitat.
If you’d rather watch than read, you can jump straight to the video below and see the whole thing come together.
In the last episode we finally got some colour on the steel and it felt like such a lift after months of staring at cold grey metal. I would have happily carried on painting, but the foundation of our future home has to be absolutely right before we can move on.
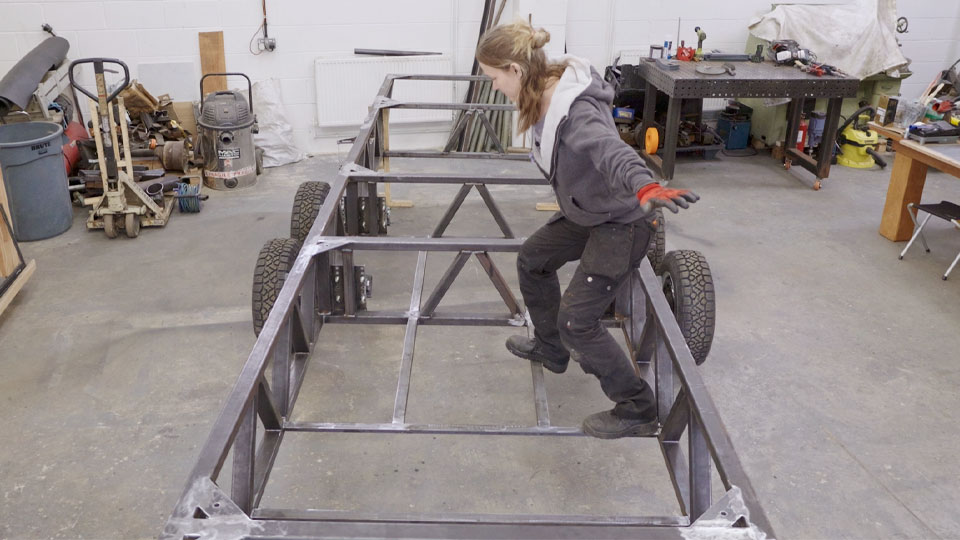
So this week, we stripped pretty much everything back off of the trailer so we could properly finish the chassis, weld in the last cross members, and add the little details that make the difference between “that’ll do” and “this will last for years”.
First job: undo half the progress we’d already shown you. Off came the hydraulic legs and any bits that were in the way so Pete could add more bracing to the front of the trailer.
He welded upright flat bar to the back of the hydraulic leg mounts to take the flex out of that area, then added angled pieces to the stiffen the front cross member and capped them off.
We’d already tacked in the cross members that hold the axles, but we still needed to weld them fully and add two more in the middle and at the back. One of them was a piece we’d actually made ages ago when the chassis was wider, so we trimmed it down and persuaded it into place.

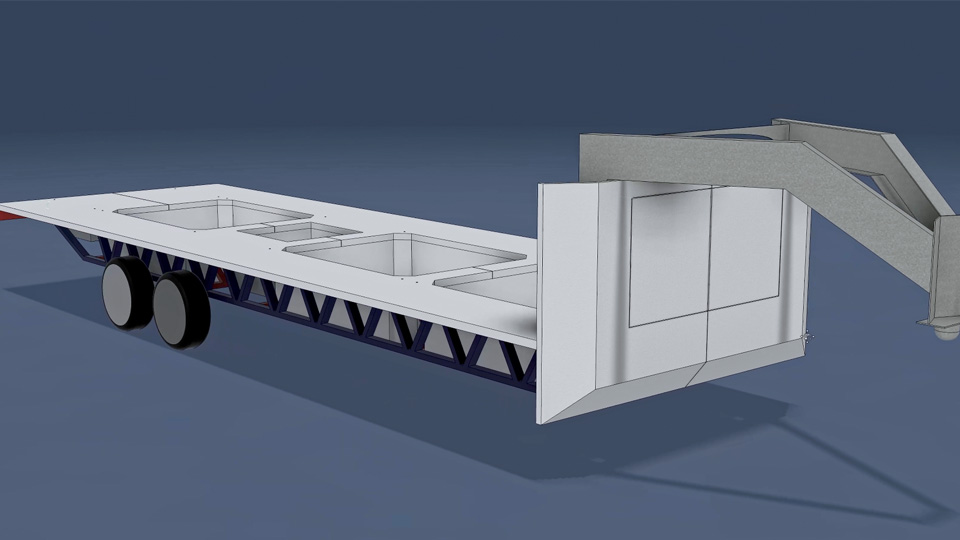
If you’ve been watching for a while, you might remember us talking about how the floor of the habitat will drop down into the trailer frame to create big underfloor storage tubs. That’s one of the reasons this trailer looks the way it does – we want to squeeze in as much storage as we can without building a heavy brick on wheels.
Originally we thought we’d need lots of extra bracing under the tubs, plus complicated plates in the corners for mounting the habitat. Pete’s dad ran some numbers for us and, it turns out, the chassis is already more than strong enough. So instead of overbuilding the steel, we focused on smart mounting points and let the composite habitat do more of the work.

We made 16 steel habitat mounts that sit in every cross‑member to chassis‑rail corner. Each one will take an M12 bolt, which is wildly overkill, but neat and satisfying. The big question was: how do we attach a fibreglass composite box to a steel frame without crushing the foam core or creating cold spots that condensate in the floor?
Enter CAD Pete. In the video he walks through his idea: the habitat floor, walls and ceiling will all be made from fibreglass composite panels with a 50 mm phenolic foam core and fibreglass skins inside and out. Simply bolting through the panel would only be as strong as the bond between the skin and the foam, and the foam always gives up first.
So instead, he wants to recess stainless steel plates with threaded inserts into the panel around each mounting location, bond them in, and then re‑laminate over the top. That spreads the load over a much bigger area, keeps all the metal encapsulated so there’s no thermal bridge from inside to outside, and leaves us with tidy threaded holes that line up with the mounts on the trailer.
If we ever have to lift the habitat off and put it back again, it’s much easier to open up a hole in a steel plate than fight a dozen bolts through a sandwich panel while you’re balancing a house in the air.
On top of that, we can add aluminium or fibreglass box section into the laminate wherever we need extra stiffening – around windows, doors, slide outs, or other heavy mounting points. It’s a lot of thought at this stage, but this is the bit that decides whether we get a light, strong, quiet home, or a rattly box full of condensation.
Once the new steel arrived, we could finally build some of the supports that will live under the habitat floor. Under certain tubs, like where the fresh water tanks and batteries are going, the composite floor will need a bit of help.
We put together a lightweight frame from angle and box section beneath the main tank area so the load spreads nicely and we’re not relying on a single sheet of fibreglass to hold a full bath’s worth of water. It’s stiff enough that we can stand on it and bounce without anything moving, and a tank spreads its weight over a bigger area than we do anyway.
In that zone we’re aiming for roughly 250 litres of capacity for water. We haven’t fully decided yet whether to make that into removable tanks or to build them into the subframe as structural elements, but the space we’ve kept free is prime real estate: right between and just ahead of the axles where weight is best carried.
We’ll have separate grey water capacity somewhere else, potentially split up, because Pete has some quite ambitious water recycling ideas he’s not ready to reveal yet.
Next to that, there’s a dedicated spot for the trailer’s electronic braking system. It’s a clever box that takes a signal from Moose’s brake lights, uses a gyroscope and load sensors to work out what the trailer’s doing, then pulls cables that operate drum brakes on off‑the‑shelf axles.
That means all the wearing parts – hubs, brakes, axles – are standard and easy to find, but the control box itself is very clever and not cheap, so it needs to be tucked somewhere strong and protected.
A lot of you quite rightly pointed out that having big cut‑outs in the neck area above Moose’s rear wheels is just asking for road spray to blast everything inside the front storage box. We agree, and that’s something we’ve had in mind from early on.
The plan is to build a large fibreglass shroud that wraps around the neck and the front storage box, tied into the habitat structure. Imagine a shaped cover wrapping around the A‑frame and box, with proper doors to access all the hydraulics, air system and electrics.
The idea is for it to be enclosed and sealed, with the underside closed off so spray from Moose’s tyres can’t get up and through, but still with enough access to reach hydraulic hoses, valves and anything that might need maintenance. It will also visually tie the neck into the main body of the habitat, which should make the whole rig look cleaner and more like one finished thing, not just a trailer with a box plonked on top.
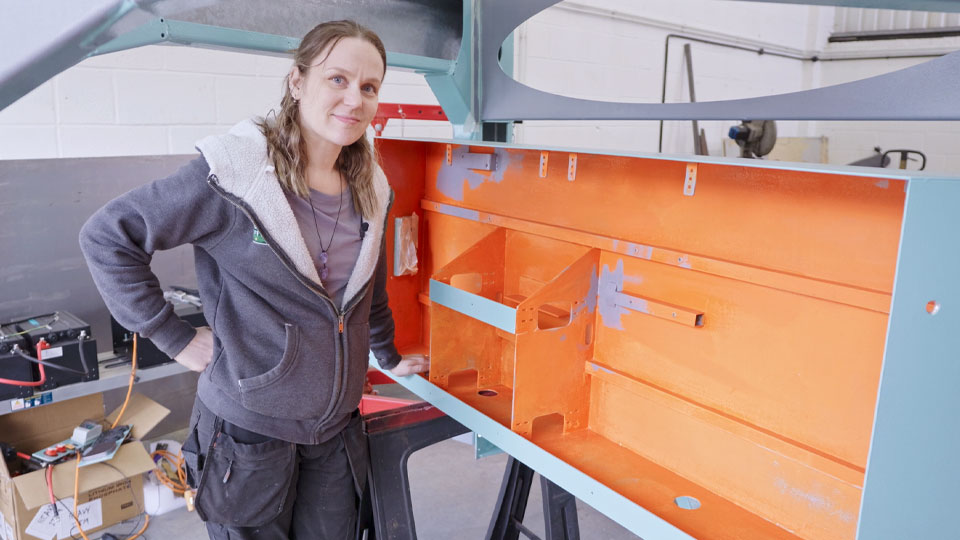
We also spent some time in this episode tweaking the little power cupboard on the neck. This is the 12 volt system that runs the hydraulic legs, the air compressor and some basic electrics on the trailer.
We’ve had a few comments worrying that 12 volts and a single battery and inverter isn’t enough for life off grid. That’s fair if this was the main system, but it’s not. This setup is really just the trailer’s own little power station for trailer jobs, with the option to feed some of it into the habitat if we ever want to.
The actual habitat system is going to be a separate beast: likely 48 volts, lots of solar, and a much bigger battery bank.
For now, we wanted to tidy up the existing cupboard: add welded tabs for cable ties, give the fuse somewhere solid to live rather than dangling, and knock off some of the orange paint where we needed to add more steel. I’ve actually grown to like the way the fresh blue on the front mixes with orange peeking through in places – it feels like a record of how this project has evolved as we learn.
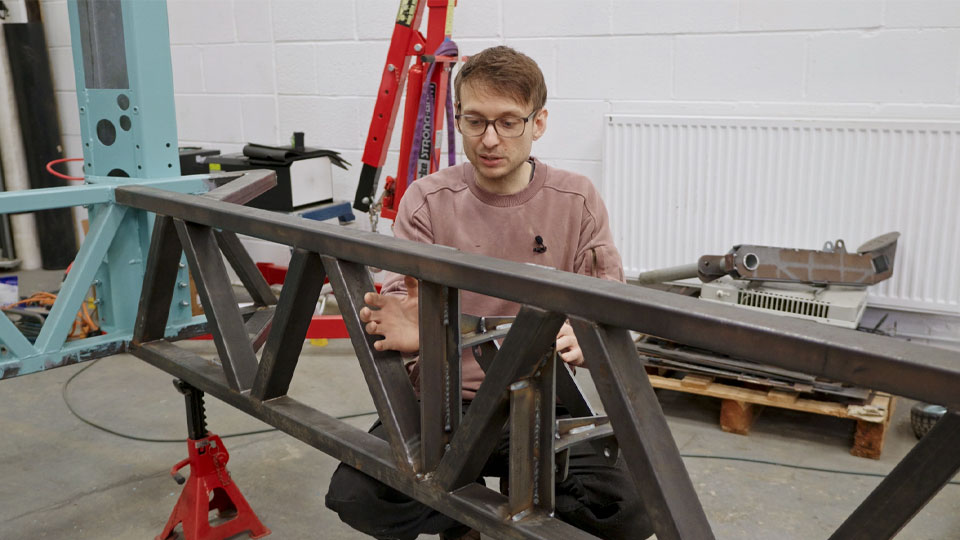
By the time we reached the final cross member at the back of the trailer, Pete was very much done with grinding welds.
That last cross member is smaller and lighter than the others because, by the time you’re behind the wheels, most of the twisting forces have already been dealt with further forward. Its job is mainly to keep the chassis rails parallel and give us somewhere to hang more storage tubs under what will become the living room area.
Right at the very back, we capped the ends of the chassis with a short piece of box section to tie everything together and give us a solid mounting point for a proper bumper. We really don’t want the fibreglass habitat to be the first thing that gets clobbered if someone runs into us, or if Pete misjudges a reversing manoeuvre. A chunky steel bumper can take that hit instead.
When the last weld was cooled, the last measurements checked, and the workshop finally swept, we were able to say the words we’ve been waiting a long time to say: the trailer chassis is entirely DONE.
We have all sixteen habitat mounts welded in, every cross member finished, the rear capped off, and a clear plan for where water tanks, braking systems and storage will live. It looks really good, and for the first time it feels like we’re standing at the start line of the habitat build, not just in a never‑ending metal fabrication project.
The next big step is to finish the suspension and run all the airlines into the front cupboard so the pneumatic system is fully plumbed. Once that’s done, we can finally get the trailer off the axle stands and see it sitting on its own wheels properly for the first time.
We’ve still got the ice‑blasting question hanging over us – whether to bring someone in to clean off all the mill scale or bite the bullet and invest in a machine – and there are always more small jobs sneaking onto the list. But the big structural part is done, and that feels huge!
If you’d like to support the channel in a way that also gives you the chance to win something back, we’ve now got our raffle website live. It’s where we’re putting prize draws for some really cool gear, including the Lymow robotic mower featured in recent episodes, plus other kit we’ll be adding over time.
The bigger goal is to help us move towards being ad free while keeping the build going, so every ticket makes a real difference. You can have a look at the live draws at raffle.roadtooffgrid.com.
