
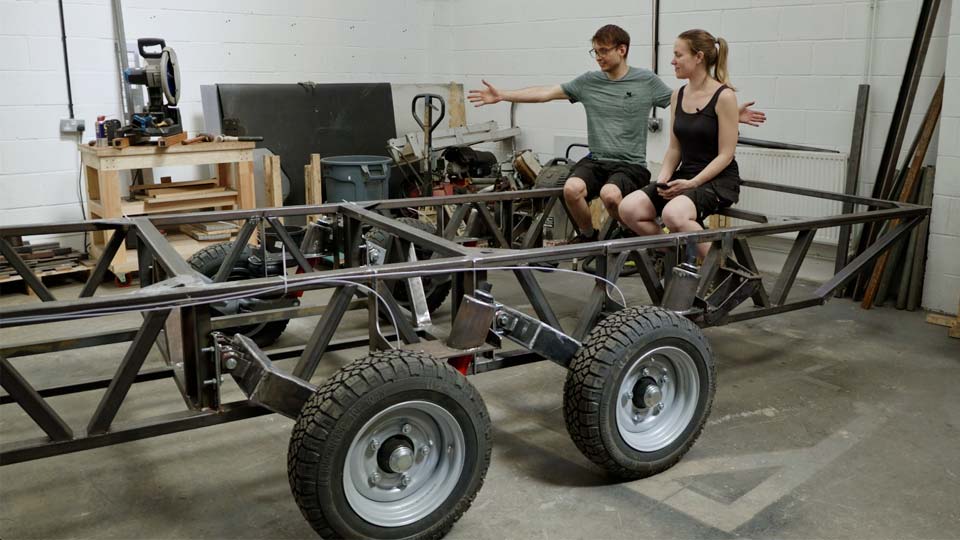
This week, the trailer stopped being a chassis on stands and stood on his own 4 wheels. Six months since we started this build, and it finally has working air suspension. It rises. It lowers. You can control it from your phone…
If you’d rather watch than read, jump straight to the video here.
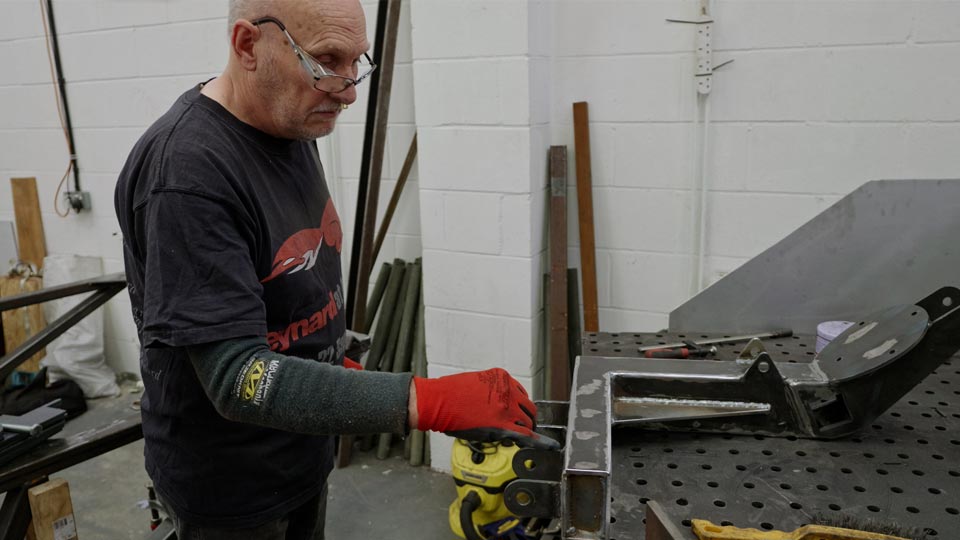
We’d enlisted a very special guest for welding day: Pete’s dad. He showed up, looked at the suspension arms Pete had been tacking together, said “they’re OK”, and then proceeded to weld up a significantly nicer-looking arm in the time it took Pete to find the grinder.
The main task was finishing the arms and getting all the mounts fabricated — the brackets that hold each airbag and shock absorber in exactly the right position on the chassis.
Pete’s dad is a fan of the “I’ll just show you how” teaching method, which tends to result in him doing the entire job while you watch. We’re not complaining!
The other lesson from the day: take your time on the grinder. Flat first, all the way along each face, then round the weld to meet them. The arms came out looking so good once they were ground back with a touch of primer.
Once the arms were done, we moved on to the brackets — welding in all the mounts that hold the airbags and shock absorbers in position on the chassis rails.
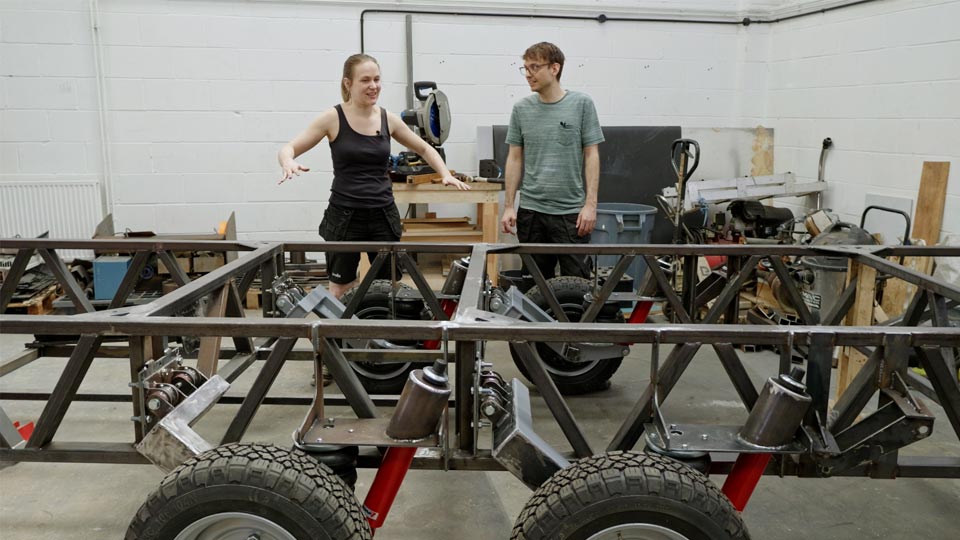
Some of the brackets lined up neatly; others landed right in line with a diagonal in one of the trusses, which meant notching pieces out, cutting to fit, and getting everything at just the right angle before any of it got tacked. If the mount’s even a fraction off, the airbag and shock won’t line up — so there was a lot of measuring, test-fitting, and measuring again.
Four sets of mounts. All in. All fully welded. Genuinely very pleased with how they look — everything packaged tightly along the side of the trailer, loads of ground clearance, and loads of space kept clear inside the frame for future storage.
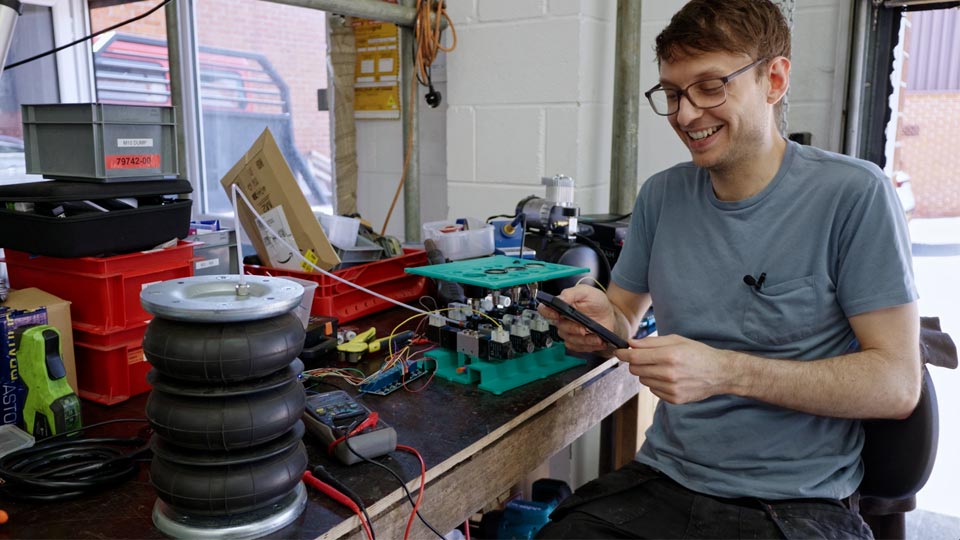
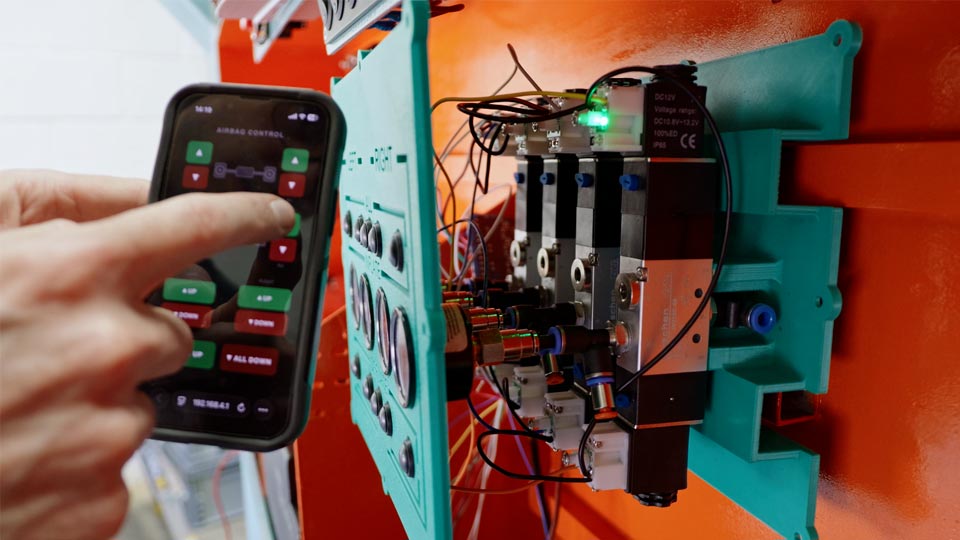
Pete has been mocking up the airbag control system for a few weeks. The idea is to control the suspension from a phone app over Wi-Fi, with individual control per bag plus left/right/all options. Later, the tiny home will have a full control system on board and the airbag control system will fully integrate.
The hardware is simple enough: an ESP32 microcontroller (the little chip with all the wires coming out) running a small web app that it hosts itself, paired with an 8-relay relay bank. Each button in the app triggers a relay, which sends a signal to the solenoid valves — inflate or deflate, per bag or all at once. Pete 3D-printed a faceplate for the control panel with all the buttons laid out.
The air itself comes from our tiny compressor in the utility cabinet. The first live test had everything going the wrong direction — up was deflating, down was inflating. Wiring flipped somewhere. But that’s an easy fix for later.
Worth being clear on what this system is and isn’t: it’s not like Moose’s old setup, which would continuous self-level while driving. This is static — fill the bags, set the ride height, and leave them. The compressor doesn’t need to constantly run. Think of it less as active suspension management and more as a very over-engineered and enjoyable solution.
One thing still on the to-do list: the airbags need a strap or stop to prevent overextension. There’s also a half-formed plan in progress around using the air suspension as a lift axle — deflate and strap one pair of arms up while manoeuvring, so you’re only pivoting on one set of wheels instead of scrubbing both. A winch to do it mechanically might be the cleanest solution. Or electronically. Then it could go on the same app as the bags and hydraulic legs! Oh, the possibilities!
Six months since we started this trailer build, all four wheels are on their own suspension. We moved the chassis stands out of the way and lowered it all the way down and back up again. It sat there looking like a proper trailer.
It is, genuinely, single-sided swing arm independent air suspension — motorbike-style, Koni off-road shocks, custom-fabricated from scratch. Neatly packaged down the sides, excellent ground clearance, room inside the frame for storage.
We were kind of lost for words, honestly. It’s a real trailer now.
The bigger wheels are coming next to complete the look!
A few of you have asked about the IVA — Individual Vehicle Approval — which is the UK process for getting a home-built or adapted vehicle legally registered for the road. Lights, brakes, and safety checks all get assessed.
The original plan was to get the bare chassis tested and approved so we could take it on the road early to check suspension and brakes. Turns out that’s not how it works — they won’t put a skeleton frame through. It needs to be a complete vehicle, which means the habitat (the living box) has to be on it first. The inside doesn’t need to be finished, just the outer shell.
So: habitat next, then IVA. More to do, but it gives us a clear target.
The EcoFlow DELTA 3 Max Plus has been keeping the workshop going this episode — powering our new air extractor and the angle grinder while Pete’s dad was grinding up a storm. We couldn’t actually plug in enough tools at once to get close to its limits, which tells you something.
It runs at 3000W continuous (6000W surge), charges from flat to 80% in about 47 minutes on fast charge, and even has a “Storm Guard” mode that checks the weather forecast and pre-charges before bad weather hits. You can prioritise which sockets stay live during a power outage, expand it up to 10kWh by chaining extra batteries, and put 1000W of solar in. It’s 2kWh out of the box — and the LFP cells are rated for 10+ years of use.
Official Website
and use code EFROADTO for 8% off
Ecoflow on Amazon
Discount Code: KW8FDWGM
💚
