

Last week was all about making our tiny house trailer do party tricks with that repurposed hydraulic levelling system, this week we’re giving all that equipment somewhere sensible to live along with an air compressor for our trailer suspension and a backup power system for the future habitat.
We started this project with a single 3mm aluminium sheet and a very loose plan. Normally, Pete would disappear into CAD world for a few hours, but this time we laid it out in the workshop and worked it out with tape measures and clamps.
The box hangs off the trailer neck, so nothing about it is square or straightforward. Cutting the panels was a bit of a puzzle, and we did have that moment where the fancy “aluminium cutting” saw blades just smeared molten metal everywhere… because we’d installed them backwards. BUT once that minor embarrassment was fixed, we ended up with all the parts we needed, perfectly cut to size.
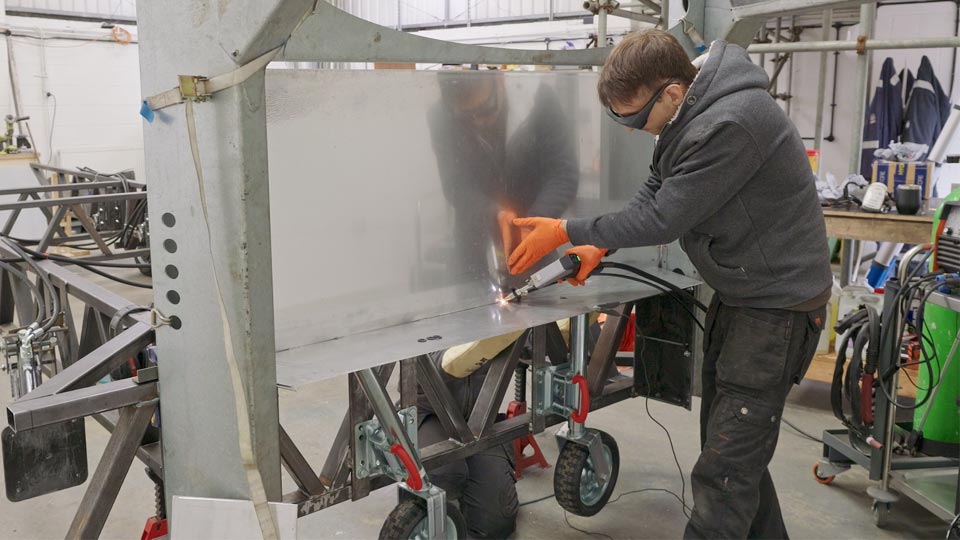
The aluminium was bowing and drooping while we tacked it in place, so we clamped angle to the back, pushed everything into shape and slowly stitched it together, trying to stay one step ahead of warping. The laser welder helped massively here: it’s basically a hot glue gun for metal, with a tiny heat-affected zone compared to TIG, which meant the finished box stayed straight and true.
We’re calling it a utility box, but it’s doing a lot of heavy lifting in the overall trailer design.
The plan is for it to house:
The goal is that the trailer can look after itself. The legs, the suspension and any trailer-related electrics will all run from this dedicated system, and if the main habitat ever has an electrical meltdown, we’ve still got a backup power source sitting up front.
We also wanted this system to be as universal as possible. That’s why we’re sticking with a fairly standard 12‑volt setup using components and batteries that are easy to replace or add to, pretty much anywhere. At full build-out we’re aiming for a few kilowatt-hours of capacity in there – we think around the five kilowatt mark.
Because the box hangs from the steel neck, we had to be careful about how aluminium and steel touch. Aluminium bolted straight onto steel is just asking for galvanic corrosion, so everything that joins the two is separated by little layers of isolation.
We drilled the neck and fitted rivnuts so the box can bolt up from the outside without needing access for a spanner inside. Around each hole in the aluminium, we doubled up the material with small welded plates to spread the load and reduce the chances of cracking over time. Then I 3D-printed a bunch of “top hat” spacers for the steel bolts to pass through, keeping them completely isolated from the aluminium box.
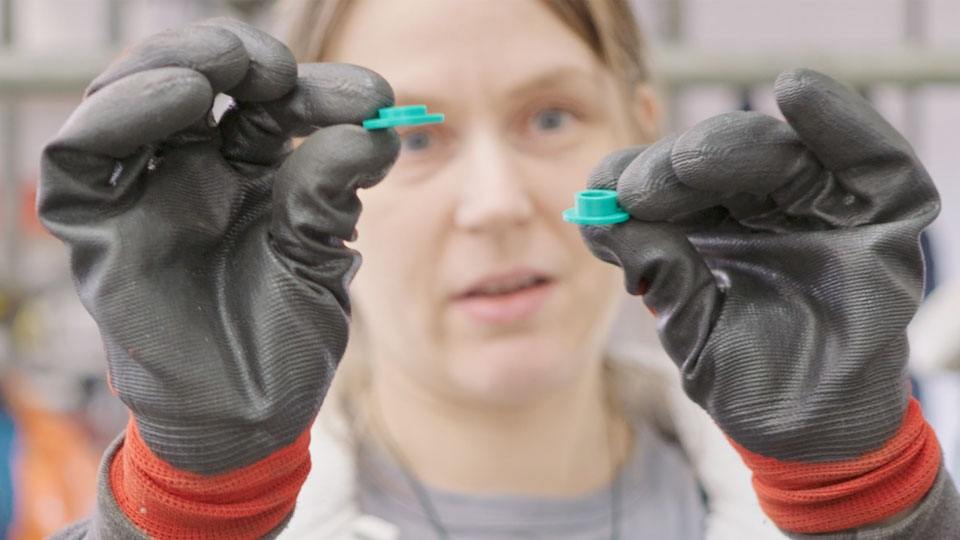
To keep the backside of the box from touching the steel trailer neck, we originally tried rubber washers, but they just squished down to nothing and would likely perish over time. Nylon washers turned out to be a better option: they keep their shape and still stop metal-on-metal contact.
Of course, this was all “measured” and “planned” until we realised one of the bolt positions was physically impossible to access with the tophat washers and strengthening plates in place. In the end, two bolts each side and three across the top were enough. At least for now.
To stiffen it all up, we added chunky aluminium angle across the bottom of the box. That piece came from Moose’s old horsebox roof – still with a bit of mud (and probably horse poo) on it when we cut it down.
The nice thing about moving to aluminium from our usual steel is the sheer weight difference. Everything in this part of the build feels light and manageable, and Pete’s back noticed the upgrade immediately. That little shelf ties the bottom edge together and made it super sturdy.
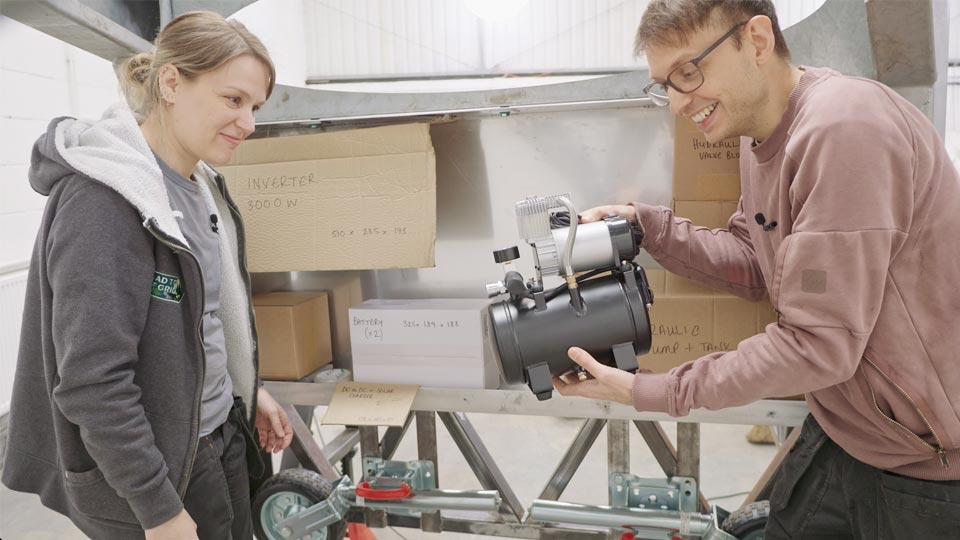
Once we had the shell hung on the neck, we moved to the really fun part: mocking up the inside. To avoid dragging heavy things in and out a hundred times, we made little carboard blocks to stand in for the key components: batteries, inverter, DC‑DC charger, hydraulic pump, valve block and air compressor.
Renogy are sending us a whole suite of gear for this system – inverter, DC‑DC charger and batteries – and everything talks to each other over Bluetooth and communications cables, so we can monitor and control it as a single smart system.
The batteries themselves are a bit special. They’re self‑heating lithium units, with Bluetooth and communication ports so they can be networked together and managed properly by the rest of the system. The heating is the big deal for us: because they can keep themselves at a happy temperature, we don’t have to wrap them in insulation and hide them deep inside the habitat. Instead, we can mount them in this external box and know they’ll still behave in Winter.
We originally thought we might squeeze three batteries into the box, but in reality it looks like it will comfortably house two, with a spare kept aside for another job later on.
After a bit of shuffling, we managed to give everything a spot in the new cabinet. It’s all quite tight, but it does fit – just.
The air suspension system is one of those areas where Pete’s love of future‑proofing really shows. The core of it is a compact valve block that routes air from the compressor to each airbag and back again. Each of the four bags has its own gauge so we can see pressure individually, and a pair of valves that either send air in or vent it out.
We’re using relatively small 4mm hoses to feed the airbags. The thinking is that a smaller line slows the airflow slightly and keeps the suspension from moving too abruptly, so you don’t get big sudden lurches when you tap a button. Testing it on the bench without weight, it still filled the airbag very quickly and launched me straight into the air when I put all my weight on it, so we’re confident it will move the trailer without drama once everything’s installed.
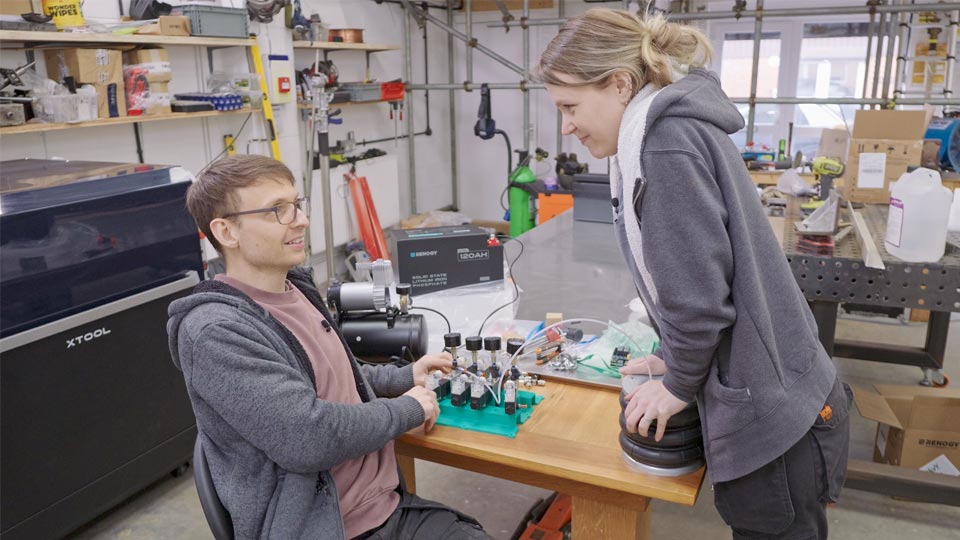
To control it all, Pete’s using a Raspberry Pi‑based relay board with push buttons. In the short term, the buttons will act like a simple manual control panel for raising and lowering each corner. Longer term, the idea is to let the microcontroller handle more advanced stuff – like “all up,” “all down,” or “find level” sequences – just by rewriting code on the Pi.
Because it’s all on a network, the dream is to be able to adjust the suspension from an app on the phone, or from the wider onboard computer system that will eventually run through the trailer. It’s indulgent, yes, but when you’re living with this stuff every day, having the option to tweak things from inside on a rainy night is quite appealing.
One nice surprise: the valve block has little blue manual override buttons on top, which work even without power. So if we ever manage to flatten every battery, we can still adjust the airbags by hand, using whatever pressure is left in the tank or a manual pump.
The hubs we’ve got for our trailer wheels are very specific 250×40 trailer hubs that play nicely with the fancy electronic braking system we’re planning to use. The brakes need to know the wheel diameter to work properly, so we can’t order that system until we lock in our wheel choice.
The problem is, the standard stud pattern on those hubs doesn’t match the more common truck and van wheels we actually want to run. To fix that, we’ve designed adaptors that bolt to the existing hubs and give us a different stud pattern on the outside, opening up a much wider choice of wheels.
We’ve been working with Will at Rhodes Vans to nail down the details. He sent us the 3D files, we printed a prototype in PLA and test‑fitted everything to check clearances and offsets. That also gives us a chance to position the axle properly before it’s welded into the suspension arms, so we can tuck the wheels neatly under the habitat instead of having them stick out.
The real ones will be machined from aluminium. As with everything on this build, we’re trying to balance practicality, serviceability and a little bit of fun engineering at the same time.
By the end of the episode, we had:
There’s still a lot to do: welding brackets for the valve block, building the shroud and front panel, actually wiring the whole electrical system, and getting that fancy braking system on order. But this box is the first real “thing” on the trailer rather than just a piece of it, and that feels like a proper step towards Moose becoming a complete, self‑contained off‑grid rig.
Sometimes, when you’re cramming hydraulic lines, valve blocks, and heavy cables into a tight space, a tape measure and a few clamps are more reliable than a computer screen. It let us see the real-world clearances before we committed to the final welds.
Not if they aren’t touching! We’ve isolated them completely using 3D-printed “top hat” spacers for the bolts to pass through and Nylon washers as a barrier between the two metals.
Definitely. It’s like a hot glue gun for metal. Because the heat-affected zone is so tiny, we didn’t have to deal with the 3mm sheet warping and twisting nearly as much as it would have with a traditional TIG setup.
It’s all about control. The smaller lines slow the airflow just enough so the suspension doesn’t lurch or jump when you’re adjusting it. It makes the whole trailer move much more smoothly.
With these Renogy units, yes. They’re self-heating lithium batteries, so they can look after themselves even when it’s freezing outside without us needing to sacrifice space inside the habitat.
While Pete was downstairs welding, I was upstairs in our treehouse office with my computer, our new 3D printer, and a digital photo frame that was meant to be for cat photos. Pete keeps hijacking it with pictures of welds and CAD drawings, but I’m keeping it topped up with plenty of cat content.
Aura kindly sponsored this episode, so that frame is actually doing double duty as a real-life test and a genuinely useful bit of future tiny home kit. It’s a neat way to show family photos without needing physical frames on every surface, and it means we can share updates with people on the other side of the world just by sending images straight to the frame.
If you’re reading this while the offer still runs, you can get £35 off Aura’s Carver Mat frame with the code “RTOG” at auraframes.co.uk.
Support from sponsors like this is a big part of how we keep progress moving.
