
When we first bought Moose from a scrapyard, the idea of re-engineering an air suspension system and cutting into his chassis felt completely out of reach. But over the last few weeks, we’ve learnt that almost anything is possible if you take it step by step, even when you’re figuring it out as you go.
This stage marks a turning point. Moose is one step closer to becoming a one-of-a-kind tiny home tower. If you’d rather watch than read, the full episode is below.
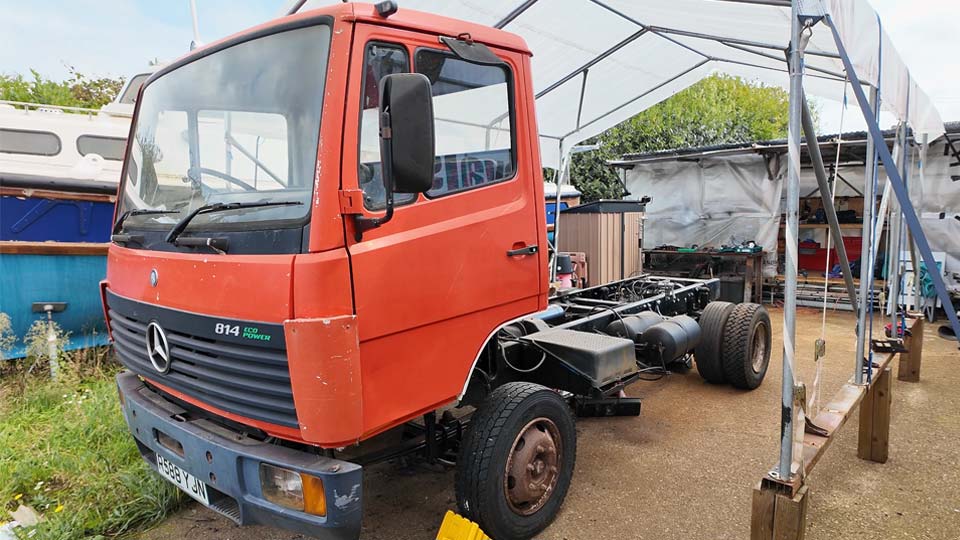
Our plan for Moose, our old Mercedes 814, is not an ordinary camper conversion. We’re turning him into a modular mini artic with a detachable tiny house trailer we’ve nicknamed Moose’s caboose. To make this work safely and to give ourselves the freedom to shorten his chassis as much as we want, we needed a modern suspension system.
Air suspension isn’t just about comfort. It means we can:
Without this step, none of the rest of the plan would have been possible.
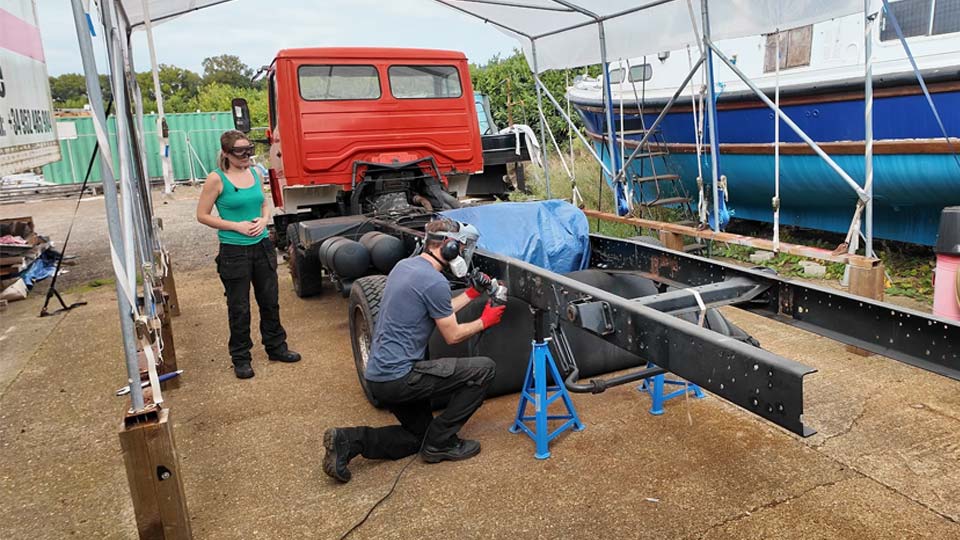
The first job was to stabilise the rear axle. We reused parts from our donor chassis, including a combined anti-roll bar and panhard rod. These stop the axle wandering sideways and keep everything aligned.

The donor chassis turned out to be a few millimetres wider than Moose’s, which made installation more nerve-wracking than we expected. There was a lot of wriggling, a lot of grease, and more patience than we thought we had in us. When it finally bolted up square, the relief was huge. Alignment here is critical, and getting it right felt like a real win.
Next came the air tank. We didn’t want to drill even more new holes into Moose’s frame, so we fabricated brackets that spaced the tank far enough out for fittings and hoses. True to our ethos, we reused heavy-duty steel from the old hydraulic leg mounts.
It was a little overkill, but they were simple, recycled, and ready for years of use.
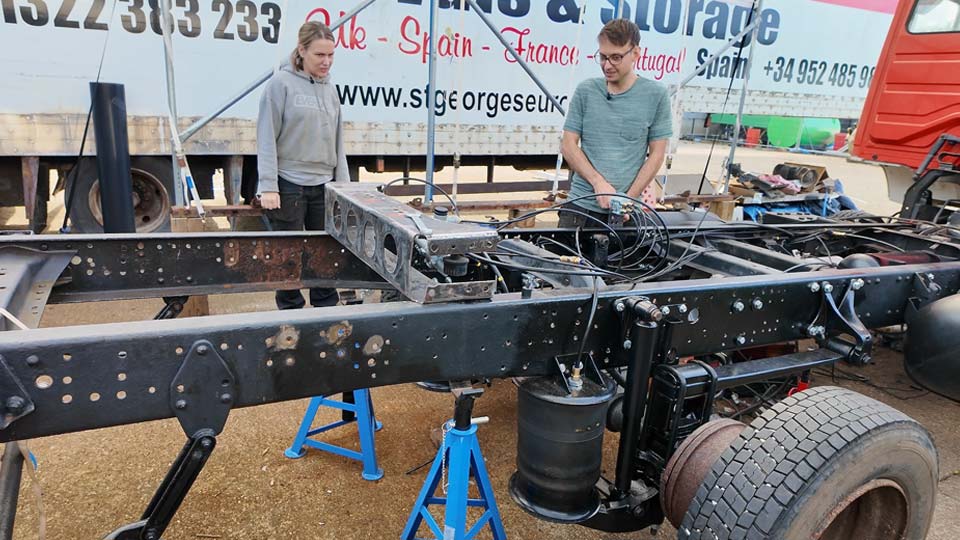
With airbags and tank in place, we turned our attention to shock absorbers. New shocks needed secure mounts, so we shifted one of the original crossmembers forward and reused the factory holes. This kept everything tied back into the original design rather than leaving it hanging off of improvised fixings.
Testing the air system with a manual valve had worked, but it’s not the right way to do it. For road use, the system needed to self-level. That meant fitting a height control valve to each airbag. As the axle moves, the valves automatically add or release air to keep the truck level.
We also swapped the old brake load sensing valve, which was designed for leaf springs, for one designed to work with airbags. Moose has no electronics so there is no modern option available for our truck. Instead, we opted for a valve that is designed for trailers and is purely mechanical. Braking power now adjusts according to the air pressure in the bags, and we’ll definitely need to calibrate this properly when we have some weight on the back.
With the valves all mounted on their neat new brackets, we began to run hoses and plumb everything together. This was the point where we started to feel out of our depth and made plenty of mistakes. We connected the air system backwards, installed a valve we didn’t need, and almost blew our bags up!
It was a frustrating process, but these are the moments that really stick. Correcting the system and seeing the bags inflate when they’re supposed to was a rush of relief. And they hold pressure overnight. AND even the air brakes work.
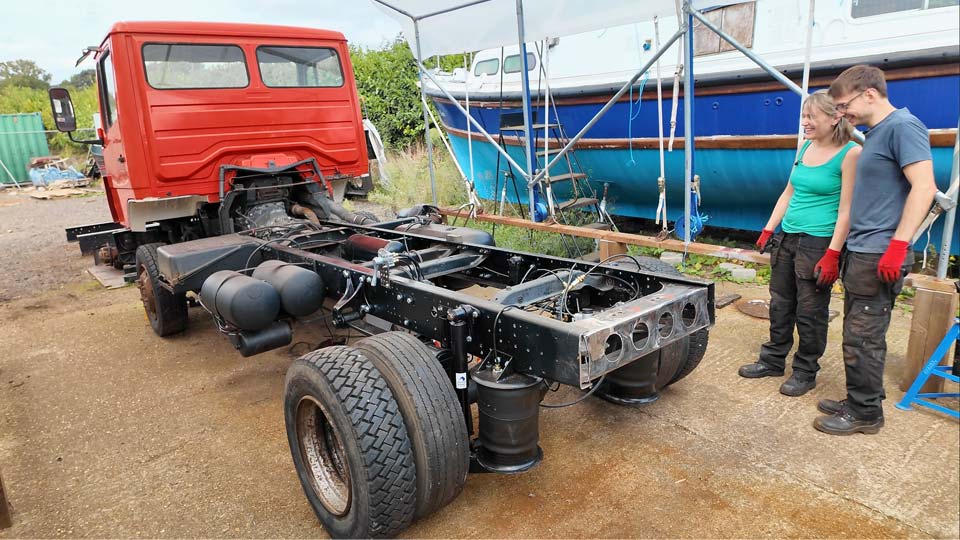
With suspension and brakes proven, we could no longer put off the job we’d been dreading. Cutting Moose’s chassis.
We measured, re-measured, and then stood back for a long while before picking up the grinder. Sparks flew, the steel rang out, and in a few minutes we had removed 2 metres of frame. What had once looked like a basic, boring chassis suddenly looked like a proper tractor unit. Stumpy and strong, and a bit like a Tonka Toy 💚
An air suspension swap and a shortened chassis were two massive hurdles that were standing in our way. With those jobs ticked off, we can turn our attention to building our flatbed.
This structure will carry the fifth wheel hitch and double as a practical deck when the trailer isn’t attached. The coupling has already been ordered from Holland, and Pete’s CAD drawings are almost ready to be brought to life in steel.
This stage of the build has been the hardest and the most rewarding. Moose isn’t just an old lorry anymore. He’s becoming the tow vehicle for a one-of-a-kind off-grid tiny home setup.
