
For those of you following along, you’ll know we’re deep into transforming Moose, our old Mercedes 814, into something a bit unusual. Not a motorhome, and not a standard truck camper, but a mini articulated lorry designed to tow a custom fifth wheel tiny home. The plan is to build a lightweight, road-legal trailer that will be our home on wheels, while Moose becomes the compact tractor unit that hauls it.
If you’d rather watch the full build in action, the video is below. We’d love to hear your thoughts in the comments, especially if you’ve tackled a fifth wheel tiny home build yourself.
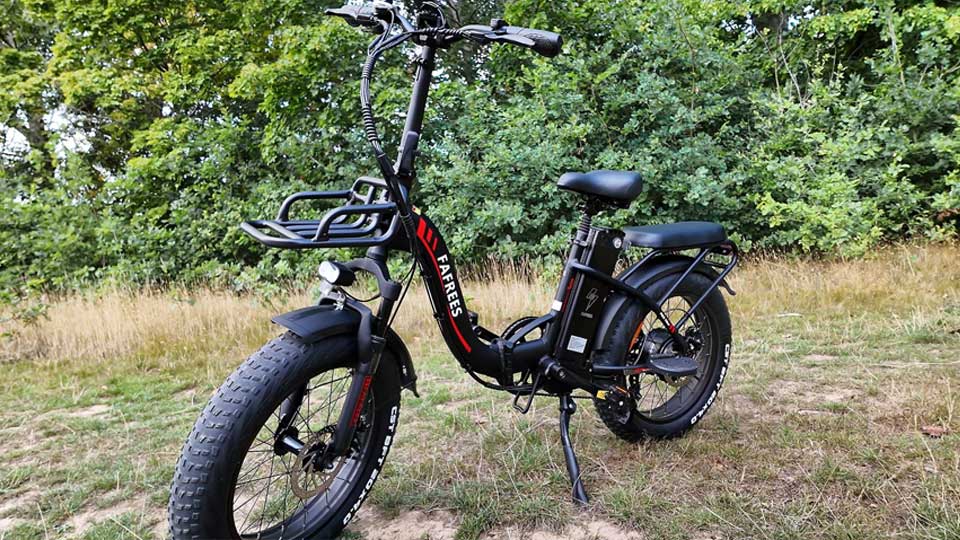
We’ve also been sponsored by Fafrees, who have sent us their F20 Max cargo e-bike to raffle off to one of you. More details are further down the page, including how to enter and how to get a discount if you’d rather buy one now.
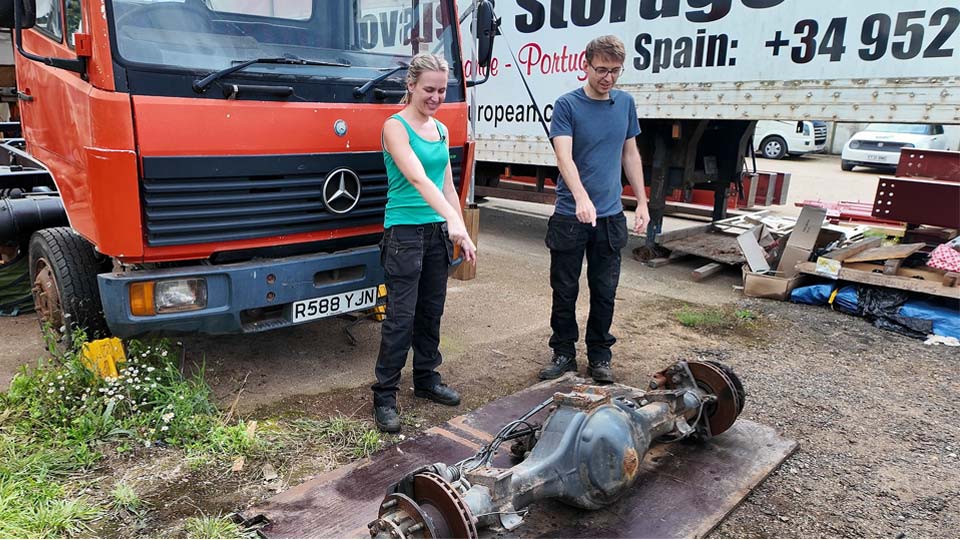
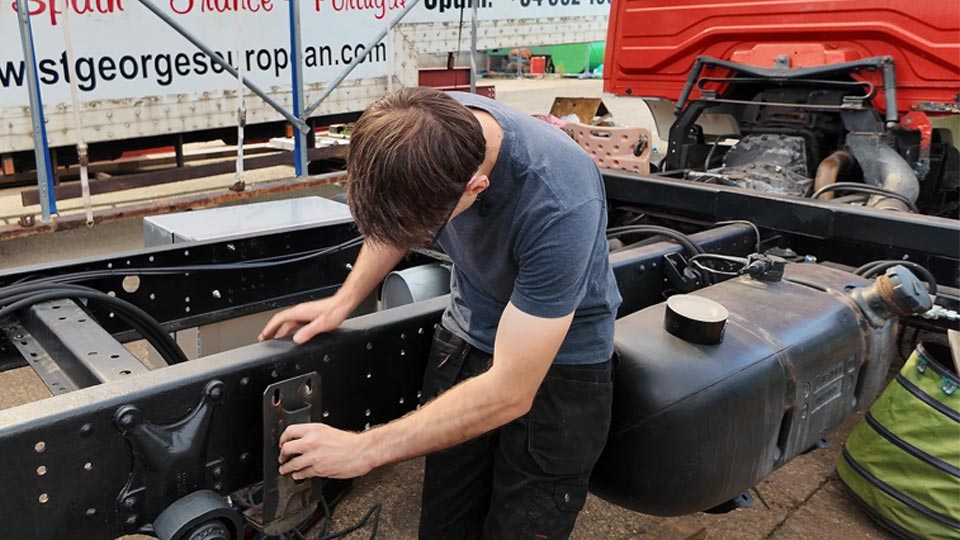
This week’s focus has been on getting Moose ready for airbag suspension. It’s a big step toward shortening his wheelbase and improving ride comfort for towing. Last time, we managed to source the exact suspension parts we needed. Now, it’s time to work out how they’ll all fit together and make the key decisions that will shape this Mercedes 814 mini artic conversion.
The first challenge was simply figuring out where to start. Faced with a pile of parts from the donor axle, it was easy to feel overwhelmed. We had three big questions to answer before we could go any further. What does each component actually do? Should we swap in the donor axle or just use its airbag suspension? And how on earth would we map the bracket placements from the donor chassis onto Moose?
Each of these decisions would affect everything that came next, from braking performance to alignment and stability. Taking the time to break it down meant we could tackle the work in a logical order, rather than rushing in and creating more problems later.
One of the first major calls was deciding what to do about the axle. After some research, we discovered the donor axle had a lower gear ratio than Moose’s current setup. That might have given better pulling power, but it would also cut down our top-end speed. For a mini articulated lorry that will see plenty of road miles, losing speed wasn’t a compromise we wanted to make.
On top of that, we realised Moose has drum brakes on the front axle. Swapping in the donor axle would mean upgrading to discs at the same time, adding cost and complexity. This linked directly to our earlier thoughts on braking performance. While improved stopping power would be nice, it wasn’t as critical as keeping the gearing and fitment right for the build.
We chose to keep Moose’s original axle and simply transfer over the airbag suspension. The trade-off is that our braking performance won’t be as strong as it could be with the donor axle, but we can always look into a brake upgrade in the future. This decision keeps our gearing intact, avoids unnecessary complexity, and means we can focus on fitting the suspension without the added challenge of a full axle swap.
With the axle decision made, our next task was working out how to mount everything accurately on Moose’s chassis. Luckily, the rails have symmetrical, repeating bolt hole patterns on both sides. This gives us a reliable reference point to ensure everything lines up. By starting from the centre of the axle, we could position the first bracket precisely, then mirror the placement on the other side. This method reduces the risk of misalignment and ensures the new airbag suspension sits square.
We used the new bump stop bracket to locate our axle centre – measuring from the front axle along the chassis rails to the new 3.15-metre wheelbase mark. With the new position marked, we could see how the trailing arms, fuel tank, and relocated hydraulic legs would fit, ensuring everything had the clearance it needed.
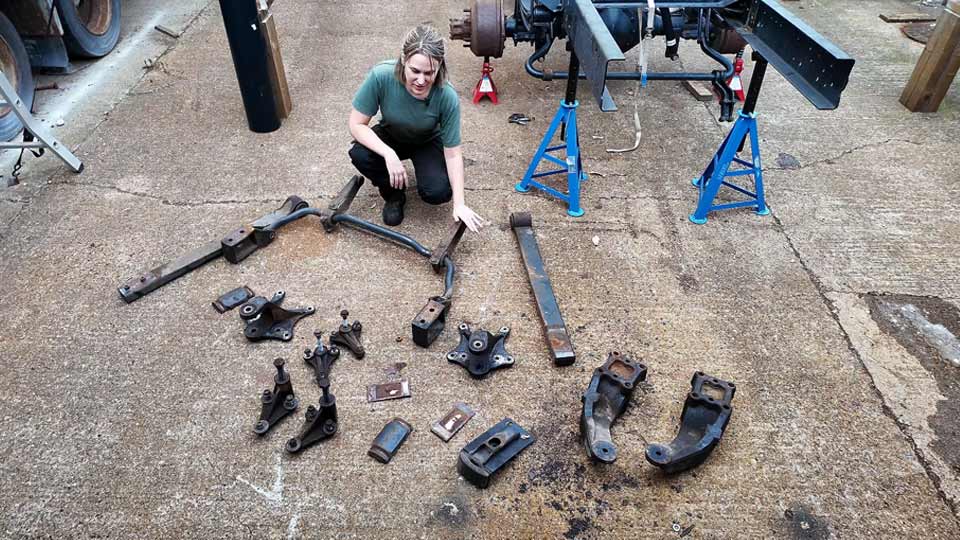
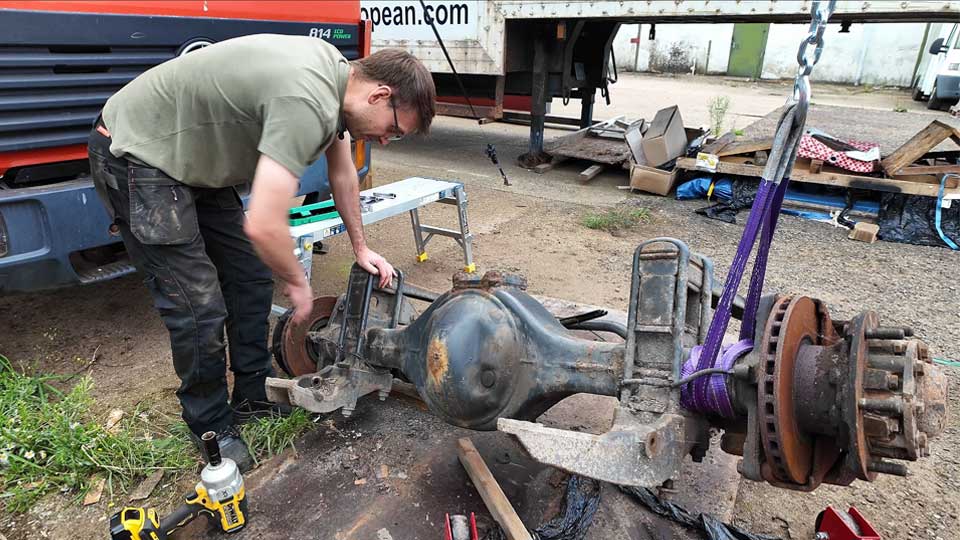
The next step was to strip the donor axle of everything we needed. Some components came away easily, while others put up more of a fight. The U-bolts holding the suspension together were especially stubborn, so rather than waste hours, we cut them off. This turned out to be the right move as they should always be replaced when removed. We also found welded-on mounts that required grinding to free. By the end of the day, we had a pile of airbag suspension parts ready for cleaning and preparation, each one essential to Moose’s transformation into a capable fifth wheel tiny home hauler.
Before we could start attaching anything new, the old leaf springs had to come off. Years of rust and dirt meant the layers were almost fused together. Some bolts freed up with heat, others needed heavy persuasion with a hammer. Each spring was incredibly heavy, making removal a slow, careful process. Once removed, we had a flat, clean surface – exactly what we needed to set down the mag drill for the next stage of fabrication.

Alongside the physical work, we had some good news from the DVSA about the chassis modifications. They confirmed they don’t mind how we shorten the wheelbase, whether by moving the axle forward or cutting and rejoining the chassis. Even better, because Moose is an older truck without EBS, we don’t need written approval from Mercedes to carry out the work. That takes a huge layer of red tape off the project.
Armed with that information, we’ve settled on a plan. We’ll move the new airbag suspension and axle forward to the target 3.15-metre wheelbase, then trim the rear chassis after everything is securely in place. We’ll keep the chassis long until the fit is perfect, which gives us flexibility if we need to make adjustments.
This approach also ties into our driving licence plans. While technically only a C1+E licence is required for a vehicle of this size with a 3.5-tonne trailer, we’re aiming for the full C+E licence to gain the skills and confidence needed for towing a large articulating trailer. It’s an investment in safety and capability that will pay off once the fifth wheel tiny home is ready for the road.
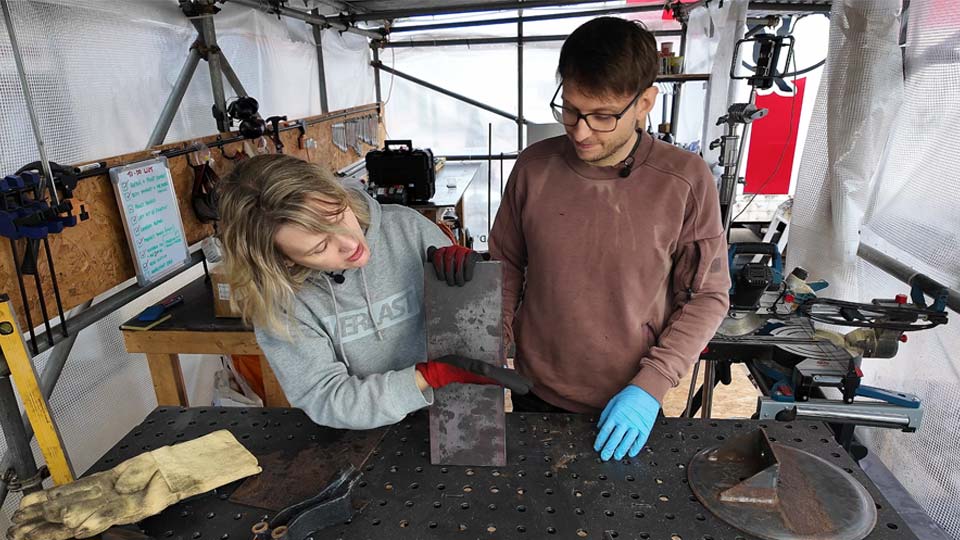
With the measurements confirmed and the surface prepared, we turned our attention to how the airbag suspension would actually attach to Moose’s existing axle. The donor mounts didn’t line up with the current U-bolt spacing, so we began fabricating a custom adapter plate. Using thick 15mm steel flat bar, we marked and clamped the layout, then used one of the original anti-roll bar mounts as a template. Drilling the first holes was a careful process, making sure everything stayed aligned. This is just the beginning of the adapter plate build, but once complete, it will allow the new airbag mounts to bolt securely to the axle without compromising strength or geometry.
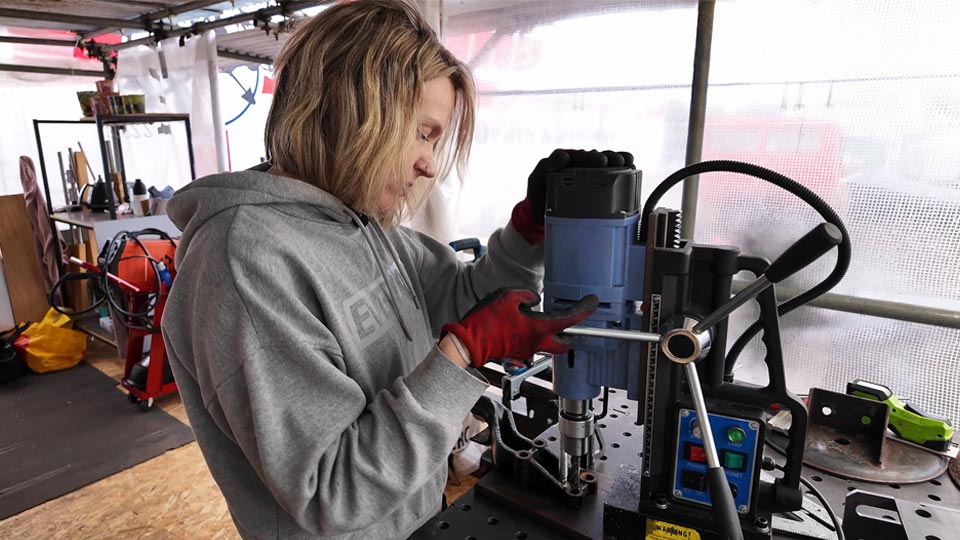
Our next job was to open up and true the holes so the new U-bolts would sit perfectly. That meant drilling straight through a stack of steel with the mag drill. The plan was sound, but the drill bit we had simply was not long enough to reach cleanly through the full depth. Rather than force it and risk wandering holes, we paused the fabrication and ordered a longer bit and a few consumables to make sure the cuts would be accurate.
While waiting on parts, we used the time to research the air suspension control side. The donor chassis used an axle-to-chassis load sensing valve that adjusts braking based on suspension compression. That system does not work with constant‑height airbag suspension, because the ride height stays the same regardless of load. The fix is to use a mechanical brake load sensor that references air pressure in the bags, not suspension travel.
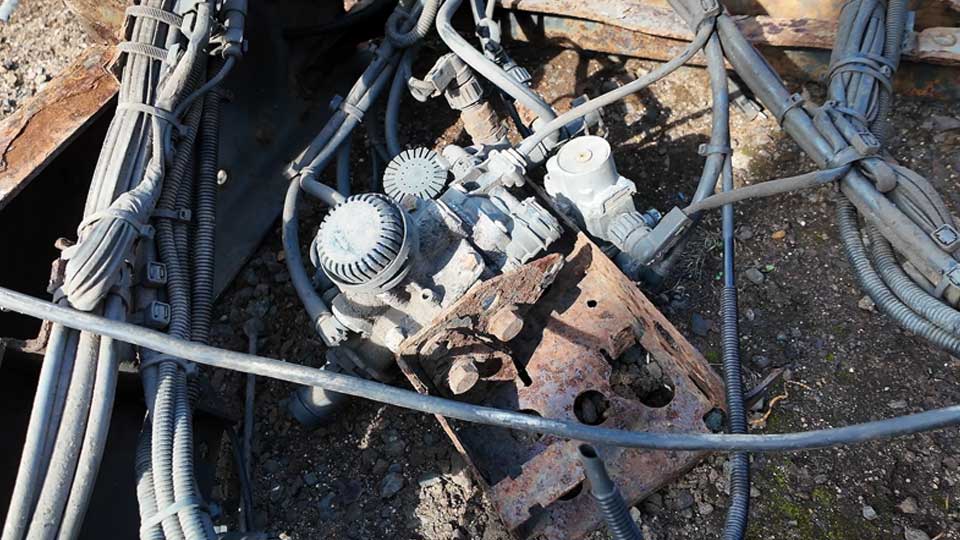
We also mapped out how to keep the truck level under varying loads. The solution is a pair of automatic mechanical levelling valves, one per airbag. As load increases, the valves feed more air to maintain height. The donor’s components were from a newer system with electronic sensors, so we will use trailer‑spec mechanical valves that do not rely on a control unit. That keeps things simple, serviceable, and compliant for a mini articulated lorry pulling a fifth wheel tiny home.
All of this means we do not need to salvage any of the donor’s electronic valves. We will source mechanical trailer-grade valves, plumb them with proper protection and service taps, and integrate the mechanical brake load sensor to ensure braking effort matches actual load. It is a straightforward setup, and it suits our goal of reliable, off‑grid friendly engineering.
We’ll be back next time with the new tooling in hand and the adapter plate ready for a proper test fit. Don’t forget to scroll down for the Fafrees F20 Max raffle details and the discount link – whether you want to win it or grab one now, it’s a brilliant way to support the build and get something useful in return.
This build is proudly sponsored by Fafrees, and they’ve given us their F20 Max cargo e-bike to raffle off to one lucky supporter. It’s a fat-tyre, heavy-duty design with a powerful 500W motor, capable of speeds over 25km/h, and a range of up to 60 miles if you ride sensibly. With a front rack, optional rear cargo basket, integrated lighting, suspension, and big disc brakes, it’s built for utility as much as fun.
You can enter the raffle for just £5, which also includes two helmets, a cargo bag, and accessories here: https://raffall.com/393473/enter-raffle-to-win-fafrees-f20-max-ebike-accessories-hosted-by-road-to-off-grid
If you can’t wait to win, use our code RTOG8 for 8% off at checkout.
https://fafreesebike.com
It’s a great way to support our build while getting the chance to own a seriously capable e-bike.
IMPORTANT DISCLAIMER:
Before entering this competition, please be aware of UK electric bike laws and ensure you are familiar with the legal requirements for riding the Fafrees F20 Max.
Although the Fafrees F20 Max is equipped with a 500W motor, the bike features a speed limiter to restrict motor assistance to 15.5 mph (25 km/h), in line with UK speed regulations for road-legal e-bikes.
However, under UK law: The motor power limit for road-legal e-bikes is 250W meaning the Fafrees F20 Max is not road-legal for use on public roads or cycle paths in the UK without appropriate modifications or registration. The bike can be used on private land and riders must ensure they comply with local laws and guidelines.
By entering this competition, you confirm that you understand these regulations and will follow all applicable laws before riding the bike. Always check your local rules for riding e-bikes and make any necessary adjustments or registrations before using the bike on public roads.
In addition, we can only guarantee to cover the cost of shipping the prize within the UK. Entrants outside of the UK may need to arrange their own shipping and import fees.
